Today I will tell you how to adjust the scale in AutoCAD. Why do you need to adjust the scale in Autocad, and in what situations should you do this? The answer is obvious - in most cases, the size of the drawing is limited to standard formats A4, A3, A2, etc. The need to change the scale also arises when creating callout elements and sections, when enlargement of a fragment is required.
By default, the program is set to 1:1 scale. Let's assume that you need to make a drawing on a scale of 1:5. Of course, you can immediately draw all the lines 5 times shorter, but this is very inconvenient, since the length of each line will have to be divided by five, although there is one trick here. There is no need to divide in your head or on a calculator; this operation can be entered directly into the value of the length of the segment.
You can divide by any number, you can also multiply by any number, subtract any number and add - the program will calculate and draw a segment of the required length. Now you know one way to adjust the scale of lines in AutoCAD, but this method is only suitable for single segments and lines. It is more important to change the scale of the finished drawing or individual view.
Let's look at how to adjust the scale of a drawing in AutoCAD using a simple example. Select the image. Segments in a view can be selected individually or all at once. In order to select a drawing view at one time, you need to click the cursor in an empty space, release the mouse button, then select the desired area and click again. On the top panel, with the “Home” tab open, find the “Zoom” button and click on it.

Let's set a point in the drawing, relative to which we will scale. I recommend indicating the point of intersection of the segments, or the origin of coordinates.

The scale value changes when the cursor moves, and the size of the drawing element also changes, but it is better to enter the scale manually; after entering, we confirm it. Accordingly, we enter a value greater than one to increase the scale of the drawing in AutoCAD, and less than one to decrease it.
There is another simple way to change the scale of a drawing in AutoCAD. The necessary drawing lines are also highlighted, then you need to right-click and select “Scale” in the menu that opens.

Further actions are similar to the previous method; the base point is set in the same way and the scale is entered.
Now you know how to change the scale in AutoCAD. It is worth noting that when scaling, the angles remain constant, but the values of the linear and radial dimensions change, as the lengths of the segments, diameters of circles, etc. change. This should not be forgotten when changing the scale of the drawing; it is especially important to check all dimensions before printing or transferring the project.
You can ask any questions you are interested in in the comments!
In this article we will talk about how to scale in AutoCAD not a single object, but the entire drawing at once. Therefore, if you are faced with the question of changing the scale of a specific element, then read the article "AutoCAD Command - Scale".
When working in AutoCAD, you should adhere to the following rules: in Model space, the construction of a drawing is always and under any circumstances carried out in a size of 1: 1(see video about the concept of working with Model and Sheet spaces). Therefore, make sure that on the “Model” tab in AutoCAD the scale is 1:1 (see figure).
How to change the scale in AutoCAD
In AutoCAD, the drawing scale is set in the lower right corner in the status bar (see figure). As you can see, in AutoCAD a scale of 1:100 or 2:1 is selected from the general list.

However, in order not to violate the above rule, let's consider how to change the scale in AutoCAD in Sheet space. This topic has been touched upon previously. Read how to make a scale different from the standard one in AutoCAD, i.e. custom and how to apply it to viewports in Sheets.
AutoCAD video scale and extras. material
Well, as you know, video material is much more informative. Therefore, I suggest you check out my free video course “Creating a project from idea to printing”, in which I touch on the topic of how to adjust the scale in AutoCAD. Here we are talking about scale in AutoCAD 2013, although there is no significant difference with other versions.
The size scale in AutoCAD deserves special attention. In the course "" there is a separate discussion about the scale of an AutoCAD drawing and the setting of dimensions during design, and most importantly it tells how to use annotation.
For information on how to reduce the scale of an individual object in AutoCAD or, conversely, increase it using a non-standard method, see the video tutorial “
Open the AutoCAD program. This program is either present as an icon on your desktop, or you can find it in the Start menu in the lower left corner of the screen.
Go to Model Space. There are two types of space in AutoCAD: Model Space and Paper Space. Your drawing should be done in Model Space, and the dimensions you add later should be in Paper Space. To switch between model and paper spaces, look at the tabs at the bottom of the screen. One tab is called 'Model Space' and the other tabs are called either 'Sheet' or 'Schematic'. The 'Sheet' or 'Scheme' tabs represent the paper space. If you are currently in Model Space mode, the screen background should be black. If you are in Paper Space mode, the background should be white.
Set the units of measurement. Engineers set different units of measurement: feet, meters, etc. To ensure accuracy and avoid confusion, it is important that the drawing is made in appropriate units. To set the units of measurement, type 'UN' on the keyboard and press the 'ENTER' key. A dialog box should appear that allows you to specify the units and precision. Type options for units of measurement are: Decimal, Scientific, Engineering, Architectural, Fractional. The 'Accuracy' section will allow you to select the number of decimal places for your dimensions. If you are doing a project for your teacher, he should have information regarding the specification of units of measurement.
Select the toolbars that will be used to create your drawing. To do this, hover your mouse over the empty space at the top of the screen next to the toolbars. Right-click and select "AutoCAD". A long list should appear with different toolbars containing different commands. The most popular toolbars used for 2D drawings in AutoCAD are Draw, Editor, and Object Properties. Select these panels and they should appear on the screen. Move them to the side to create space for your drawing. The Draw panel contains basic drawing tools. The Editor panel contains editing tools. The Object Properties panel contains style and color controls
Turn on Snap mode."Snapping", which refers to the snapping of objects, is the most important property when creating a drawing. It allows you to see where the midpoint and endpoint of a line is, the tangent of a circle, and other useful information. To enable Snap mode, press F3 on your keyboard. To make sure snapping mode is enabled, right-click on the icon labeled ‘Snapping’ in the lower left corner of the screen. A dialog box should appear on the screen. Click on the ‘Select All’ button, thereby enabling all binding options.
Displaying a drawing at different scales is a mandatory feature of graphic design programs. This allows you to display designed objects for different purposes and generate sheets with working drawings.
Today we’ll talk about how to change the scale of a drawing and the objects that make it up in AutoCAD.
Setting the drawing scale
According to the rules of electronic drawing, all objects that make up the drawing must be done on a scale of 1:1. More compact scales are assigned to drawings only for printing, saving to digital format, or when creating worksheet layouts.
In order to increase or decrease the scale of a saved drawing in AutoCAD, press “Ctrl + P” and in the print settings window, in the “Print scale” field, select the appropriate one.

Having selected the type of drawing to save, its format, orientation and saving area, click “Preview” to see how well the scaled drawing fits on the future document.
Setting the drawing scale on the layout
Go to the Layout tab. This is a layout of a sheet on which your drawings, annotations, stamps, etc. can be located. Let's change the scale of the drawing on the layout.

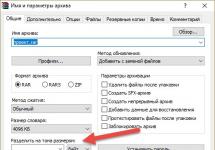
1. Select a drawing. Open the properties panel by calling it from the context menu.
2. In the “Miscellaneous” rollout of the property panel, find the line “Standard scale”. Select the desired scale from the drop-down list.
While scrolling through the list, hover your cursor over the scale (without clicking on it) and you will see how the scale in the drawing will change.

Scaling an object
There is a difference between changing the scale of a drawing and scaling objects. To scale an object in AutoCAD means to proportionally increase or decrease its natural dimensions.
1. If you want to scale an object, select it, go to the “Home” - “Editing” tab, click the “Scale” button.

2. Click on the object, defining a base point for scaling (most often the intersection of the lines of the object is selected as the base point).

3. In the line that appears, enter a number that will correspond to the scaling proportions (for example, if you enter “2”, the object will be doubled in size).

In this lesson we figured out how to work with scales in the AutoCAD environment. Master scaling techniques and the speed of your work will increase noticeably.
In this video and this article I discussed a sore subject for many - scaling in AutoCAD, including the following chips:
– How to change the scale of objects in AutoCAD
– how to increase the scale of dimensions in AutoCAD
– how to zoom out in AutoCAD
–How to adjust the view scale
– How to change the scale of sizes, texts, etc.
– how to set the scale for a drawing to 1:1, 1:100, 1:200 and 1:500
– how to change the scale in a sheet
Enjoy watching :)
Video version of the lesson:
Take the basic course “AutoCAD in 40 minutes” from the author, which you can find at.
Text version of the lesson:
Scale in AutoCAD is a topic that affects both drawings and dimensions and texts. The lesson also covers scaling of Views in Layout space.
Many designers to this day make a mistake - draw the drawing immediately to scale in infinite space, which is located on the “Model” tab:
It is much easier to work correctly and rationally.
We carry out our drawing in the lightest and most “unpretentious” scale – 1:1, on an endless work canvas (the “Model” space), and then go to the “Sheet1” tab, and there we easily set the scale of our view, in the so-called Viewport:

- Activate the viewport by double-clicking the left mouse button inside it, i.e. anywhere within the rectangular contour of the VE.
- They “find” the required drawing from the Model space, that is, we move-move-move the drawing in the Viewport in order to place the desired drawing in its field of view. For example, this is the plan of the first floor of a cottage.
- Click on the button at the bottom right on the Modes panel - see the picture below.
- Select a scale from the list
- Center the drawing in the viewport WITHOUT zooming (without zooming in or out).
- Block, i.e. fix the VE by clicking again with the left mouse button twice, but outside its boundaries.

In huge drawings made in the Model on a scale of 1:1, dimensional numbers with a height of 2.5 mm and even 5 mm visually turn into a dot or are not visible at all. After all, everything is logical - the drawing has overall dimensions of 5 - 10 meters. What is 3.5 millimeters compared to 5 meters? invisible thing :)
So, in order for the model to have a drawing scale of 1:1, all dimensions are purely visually larger (for readability), all your texts and sizes must be performed in annotative styles.
First, the text style is set up and Annotativeness is set there, then the dimensional style is also set to Annotativeness, so that the text, serifs and arrows are also visually enlarged on a huge construction drawing.

About setting texts and sizes I have corresponding video tutorials.
Now and in Sheets, your dimensions will always have dimensional numbers of a predetermined height(for example 2.5 or 3.5 mm), at any scale of the drawing itself. This is another indisputable advantage of Annotativity.
Important: don't forget to enable 2 options, as shown in the picture below, so that there is no such oversight: in the Model and in the Sheet, for example, you have different annotation scales set, and you simply do not see such sizes in the Sheet. Enable these 2 modes, and everything will always be displayed in Sheets:

Be sure to get my more detailed basic Video course “AutoCAD in 40 minutes” by clicking on the picture below:
Other lessons on the topic
In this video and tutorial we will show you how to work with properties in AutoCAD, as well as how the properties panel and copying work. The lesson will answer the following questions: – What are Properties in AutoCAD? – How to enable the properties panel in AutoCAD? – What are quick properties and how to disable them? – How to copy properties in AutoCAD […]