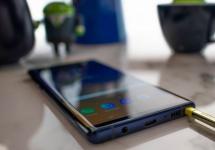
It's very easy to forget a password or pattern. This is a common problem due to which some even run to the service center. But in fact, you shouldn’t waste time looking for such a center in your city. Below are instructions for Sony Xperia owners to easily bypass the lock screen. By the way, This is what they use in service centers.
Please note that this text is intended specifically for unlocking Xperia smartphones. On devices from other manufacturers, you will have to try to bypass the blocking in other ways.
Step-by-step instruction
- The operation begins by pressing the emergency call button. On the keyboard that appears, enter the code:
- After entering the last character, the service menu will be displayed. It is also called engineering. Here select “Service Tests”.
- In the list that appears, find the “NFC” item. In it we are interested in the sub-item “NFC Diag Test”. It runs a diagnostic test. Wait for it to finish, then click on the “Home” button.
That's all, so you will find yourself on the desktop. This trick works on all Xperias. If you have a new model in which this operation does not lead to the desired result, then try entering the code *#*#73556673#*#* on the emergency call screen. It does not work for all smartphones; on some models it only leads to a normal reboot of the device.
Updated: If no codes work on your device, 100% will help. It puts the device into operation even from the “brick” state.
If you have any difficulties, watching this video should help. You can also write your questions or thoughts in the comment form below!
But the guy demonstrates in a video how everything is done on the XPeria Z:
Removing a Google account from a smartphone may be necessary if you need to log into another account, transfer the device to another person for use, for example, when selling, or to disable annoying synchronization, which terribly slows down the operation of older models of mobile phones. Many are afraid of disclosing personal data (real name, location, contacts and personal correspondence) and believe that the corporation stores all data about the user, regardless of his wishes.
Be that as it may, the question “how to unlink a phone from a Google account” is of interest to most owners of smartphones with the Android operating system.
What will be deleted along with the account
Before you think about how to delete your Google account, you should save all your data to an external source: to a computer, cloud storage or a flash drive. You need to rewrite the phone numbers and email addresses of contacts saved on your account, copy application data, photos, videos, music, and calendar events. Don't forget about backups. After completely deleting an account, this data cannot be restored, but if you only plan to turn off the device, leaving the settings of the account itself, then progress in games and synchronized photos, music and videos will be saved.

You can also download all data before completely deleting your account using Google tools. From your computer you need to go to the “Data Saving” page, select the information of the services that need to be saved and specify the archive format. Next, you should wait from a few minutes to 2-3 days (if there is a lot of data, for example letters, saving will take a long time). As soon as the archive is created, you will receive an email notification with a download link.
Operation Hard Reset
How to unlink your phone from your Google account quickly? The easiest way is the Hard Reset operation. You can reset all settings and return the device to its original state using the operating system software.
You need to go to the settings menu, select “Backup and reset” (may also be called “Reset settings”, “Backup and reset” or “Reset personal data”). The operating system will ask you to confirm your intentions. Next, the phone will reboot and will be completely cleaned.
Hard Reset on some models can be done by simultaneously pressing the Power button, Volume Up button, and Home button. The phone will go to a menu where you need to use the sound buttons to select the Wipe option and confirm by pressing Home.
Attention! Resetting settings in this way erases absolutely all data from the phone, except for information on the memory card. Just in case, it is better to remove the SD card before performing the operation, especially if the sound, power off and main screen buttons are used.
Deleting an account manually
How to unlink a phone from a Google account if there is no need to return the device to its original settings, but just need to log into another account? To do this, open the “Accounts and synchronization” (or “Accounts”) menu in the smartphone settings, select your account, call up the additional menu and click on “Delete account”.

Complete account deletion
How to delete a Google account completely so that it ceases to exist even on the corporation’s servers? If the operation is carried out from a smartphone, you need to go to the phone settings menu, select “Accounts” (or “Accounts and synchronization”) and click on the name of your account. In the context menu, which is called up by clicking on three dots or a mechanical button, you should select “Account Settings” - “Deleting an account and disabling services.” You will be redirected to a web page where you need to log in with the username and password corresponding to the account that is to be deleted. Then you should confirm the complete deletion of your account.

How to delete a Google account from a computer? It's easier here: the "Delete Google Account" option is available in the "Account Settings" section on the "My Google Account" page. On the same page, you can simply disable synchronization or unused services.
Removing a connected device: using a computer
How to unlink your phone from your Google account using a computer? You can remove a connected device in the following way:
- you need to go to the search engine website and log in;
- then go to the “My Account” page;
- find the item "My devices" or "Search for phone";
- select the smartphone that you want to disconnect and click “Log out of your account on the device”;
- confirm your action.

In fact, the question is: “How to unlink a phone from a Google account, Android smartphone?” - does not cause difficulties. There are several methods from which you just need to choose the appropriate option. The operation itself will take only 5-10 minutes. After this, the account will be deleted from the smartphone.
Let's figure out how to delete a Google account on Android or stop synchronizing it with the device. You will find out if your account can be restored. All step-by-step instructions are supported by illustrations and detailed instructions.
A Google account is a user page of the search engine of the same name, which allows you to combine all Google services (social network Google+), video hosting YouTube, Google Docs. Also, a Google account is used in the Android OS. With its help, you can manage data on your smartphone, set up email, and use the application store.
Linking a Google account to an Android device is the first action a user performs after purchasing a device. Without an established account, you cannot start using the phone. Let's take a closer look at how to delete a Google account from an Android phone and get the deleted data back.
Why do you need to delete your account?
Account deactivation is necessary if you have forgotten the password to access your old profile, transferred your device to another person, or simply want to create a completely new account for convenient use of the Google+ social network.
Sometimes users may encounter situations where their account is hacked. In this case, an attacker can remotely read your credit card data, logins and passwords from various sites. The only solution to the problem is to delete the profile or unlink it from the phone.
If you do not want to unlink your account from the operating system, but need to stop sending data and synchronizing your account with your phone, you need to temporarily disable the account in your phone settings. You can re-enable your account on your smartphone at any time.
Note! Once you delete your account, it not only disappears from your smartphone, but is also permanently deleted from Google's server. This means you can no longer access your subscriptions, emails, and other important data from any device or browser. If the account needs to be deleted only on the phone, it is recommended to create a second account and link it to the device, and temporarily disable the first profile. Thus, the disabled account will remain available for use on any other gadget.
Deleting a Google account - step-by-step instructions for 4 methods
There are 4 main ways, how to delete google account in OS Android. Each method must be used depending on the installed version of the operating system and whether you have superuser rights.
Method 1 – Through Android Settings
This account deletion method is simple, fast and secure. Use it in such cases:
- You now need to erase your profile in order to remove any errors that have appeared in your email, calendar, or Google services. After temporary deletion, the user will be able to re-authorize and use this account;
- You give your smartphone or tablet to another person and do not want him to read your messages or have access to YouTube and your social networks;
- You want to log in with a new account and need to use your existing account on a computer or another phone.
As a result of executing this method, all settings, user data and programs in the mobile gadget will be saved. Essentially, you do not delete the profile, but simply unlink it from your smartphone.
Follow the instructions:
- Open the main menu on your smartphone and go to the settings window;
- Go to the “Personal” section;
- Click on the “Accounts” section;
- In the window that opens, data about the linked Google account, which is synchronized with Android, will appear. Click on the additional settings button in the right corner;
- In the list that appears, click on “Delete entry”.
After uninstalling your account, it is better to restart your smartphone so that all the settings take effect. When the phone is turned on again, the system will ask the user to link a new account (an existing Google page or a new account).
What to do if the message “Error deleting Google account” appears
Sometimes users encounter an error during standard Google account deletion. In this case, nothing changes and after a reboot, the old account remains linked to the smartphone.
The problem can be solved very simply - you need to create a new Google profile and link it to the Android OS. Then you should simply delete the second account that is no longer needed. Follow the instructions:
- Go to the applications menu and open the standard Gmail email client. By default, this program is installed on all devices with Android OS;
- After downloading the application, click on the “Options” button, which is located in the upper left corner;
- Select “Add account”;
- Next, you will be redirected to the new account linking window. From the list of suggested email clients, select Google;
- Now select the account type (new or existing). Register or enter your username and password to log in;
- After successfully logging into your new account, you will be able to select the desired account in the settings of the standard Gmail program. Please note that one mail (currently open) is the main one, and the second is an additional one. To change the status of a mailbox, simply click on its name. With the change in the status of the Gmail account, the main account for the entire OS on the smartphone will also change.
- After selecting a new account as the main one, return to the phone settings window and delete the extra account as described above. The uninstall error will no longer appear.
Method 2 – Complete account deletion
This method of deleting an account involves completely deleting all data associated with the account from your smartphone. At the same time, the account itself will be available for use from the browser, because the login and access password will be saved by the Google server.
There will be no settings or data left on the smartphone that were associated with the old account. This is possible thanks to the factory reset function (also known as Hard Reset). As a result of resetting and restarting the phone, the system will need to be configured again (create a new Google entry, select a time zone, reconnect to the router, etc.).
It is recommended to use Hard Reset if you have encountered serious problems with your smartphone, have forgotten your screen unlock password, your previous account was hacked, or you are absolutely sure that you will never need your old mailbox and other user data again.
Follow the instructions to completely delete your Google account on Android (the method works):

- Select "Backup and reset";
- In the window that appears, click on the “Reset settings” field;
- Confirm the action. The gadget will reboot automatically.
Note! As a result of the reset, absolutely all user settings, files, installed programs, and phone book numbers will be erased. Before resetting, it is recommended that you back up or move the data you need to your computer.
Method 3 – Stop Synchronization

If you don't want to delete your account and link a new one, you can simply temporarily stop synchronizing the connected account with your phone. This option is available thanks to the Google Accounts service - a standard utility that unites all Google applications.
Google Accounts regularly uploads data about available updates and manages your account settings. To stop your account, follow the instructions:
- Go to your smartphone settings;
- Select the “Applications” section;
- In the window that opens, go to the “All” tab;
- Find the Google Accounts system service and open it;
- In the new window, click on the “Force stop” button. To restore the service, simply reboot the device. All account settings will be saved.
To erase all accounts linked to Android, click on the “Erase data” button.
Another removal method requires superuser rights. On phones with an active Google account, you can delete your Google account in a few clicks. Simply open the system folder in Explorer and erase the desired file.
Follow the instructions:
- Open File Explorer and go to the Android-Data-System folder;
- Find the component called ACCOUNTS.DB and remove it.
- Reboot the OS and log in using the new Google page.
Now you know all the basic methods, how to delete google account. Let's consider how to recover profile Android.
Google Account Recovery
A deleted Google account can only be recovered for a limited amount of time. Officially, the developers do not disclose the storage time for account backups on their servers, but according to user reports, this period ranges from 2 to 3 months.
To reuse a profile on your smartphone, you first need to restore it using any browser. You can only return the page to which the phone number was linked (and you have access to this number).
Follow the instructions to find out how to recover a deleted Google account on Android:
- Open your mobile or desktop browser and go to the page https://accounts.google.com/signin/recovery?hl=ru ;
- Enter your phone number or email address;
- A message with an access code will be sent to the linked number. After entering the correct code, the deleted account will be automatically restored. If recovery is not available, you will not receive a message with a code to the specified phone number.
Bottom line
As you can see, deleting and returning a Google account is quite simple and even a beginner can cope with this task. Share your options on how else you can delete your account or restore its functionality. Ask any questions you have below in the comments.
We can name many reasons for blocking access to a Sony phone. One of the main reasons is that you forgot the password you created. While it is unlikely that anyone would forget their password, it does happen quite often among users. The inability to bypass the screen lock is annoying as the phone becomes an important part of our lives. We will tell you how to unlock Sony password (Xperia) in 3 ways.
There are several ways to reset your screen lock. The available methods depend on the screen lock type and the version of Android your Xperia device is running. Some of the methods, such as those using Xperia My Service or Android Device Manager/Find My Device, require you to already have the service enabled on your device and have an internet connection enabled.
Read the table of contents to quickly find the information you need.
The note! Before you do any of the steps in this article, make sure you know your Google username and password. Depending on your security settings, your Xperia device may become locked after a reset or restore. Then you need to enter your Google account username and password to use the device. If you don't remember your Google username and password, you can't unlock the device yourself.
Advice. You can recover your Google account username and password using the Google account recovery page on . For Xperia X, Xperia L1, Xperia E5 and Xperia Z series (Android 5.1 or higher), you should know that when you receive a new Google username or password, you cannot use it to register and restore your device for 24 hours.
1. Click: Forgot your password?
2. To unlock your phone, you can answer the security question you set up when you set the screen lock. Or you can enter your Google account username and password. Click " Further».

3. Enter the answer to the question you selected or enter your Google account username and password. Click " Unblock».
4. You will be asked if you want to create a new screen unlock password. If you don't want to, click No.

If you haven't created a Google account or if you've forgotten the answer to your security question, you'll need to reinstall your phone software. This will delete any information stored on your phone. There's no way to recover the data that will be lost if you do this, but you won't be able to reset your screen lock without reinstalling the software. Read below on how to reset Sony.
Using the Xperia service to reset your screen lock
The note! Make sure you know your Google™ username and password. You may have to use them to use your Xperia™ device after the reset.
Using the Xperia service to reset your screen lock. All content on your Xperia device is retained after you reset your device's screen lock. The note! This method is not available on devices running Android 7.0 and above.
This reset method requires you to have previously enabled Xperia My Service on your Xperia device. Your Xperia device must also have an active internet connection (Wi-Fi® or mobile network).
How to reset your password using Xperia service
1. Turn off your phone.
2. To hard reset your phone, start by pressing and holding power buttons + buttonincrease the volume in within a few seconds.
3. The device will vibrate once. At this point, you can release the Power button. Continue holding the Volume key for another 10 seconds.
4. The phone will vibrate and then turn off, indicating that the hard reset procedure is complete.
Using Find My Device to Reset Sony Password
The note! Make sure you know your Google username and password. You may have to use them to use your Xperia™ device after the reset.
This reset method requires you to have previously enabled Android Device Manager on your Xperia™ device. Your Xperia™ device must also have an active internet connection (Wi-Fi® or mobile network). Selecting this method performs a full factory data reset. All content on your Xperia™ device will be deleted. In some cases, the content on the SD card may not be erased during a Find My Device reset.
If your SD card is not encrypted, you can remove it before performing the reset to prevent it from being erased. However, if you are using an Xperia™ device in a corporate environment, your IT department may have to force encryption on the SD card on your device. In this case, the contents of the SD card are erased or unreadable when you perform a reset, even if you remove the card beforehand.
How to Reset Sony Password Using Find My Device
1. If your SD card is not encrypted or not used in a corporate environment, remove it before performing a reset. Before removing the SD card, turn off your Xperia™ device. Turn on the device when you have removed the SD card.
2. On your computer or mobile browser, go to the website.
3. Sign in to the Google account you previously added to your device.
4. If you have multiple devices, select the device you have blocked at the top of the screen.
5. Select " Erase" Keep in mind that this action will permanently destroy all your data, such as your apps, photos, and music. Once you delete the contents of your device, Find My Device will no longer work on your device.
6. After remotely erasing the contents of your device, you can set up your device again with your Google account and a new screen lock.
Recovery software to reset your Xperia device
The note! Make sure you know your Google username and password. You may need to use them to use your Xperia™ device after recovery.
You can reset your screen lock using a USB cable, your computer, and the software recovery feature in the Xperia™ Companion app.
The note! The software recovery feature replaces the software on your device. All personal data stored on your device will be lost. Content on the external SD card is not deleted. Xperia™ devices must have a minimum charge level of 80% before you can perform a software restore.
Steps:
1. Computer: if it is not already installed, download and install the Xperia Companion app from .
2. Open the Xperia Companion app.
3. In the section " Xperia Management" click " Software recovery».
4. Follow the on-screen instructions, but do not connect your Xperia device to your computer until you are told the five-step instructions in the Xperia Companion window.