To understand why Windows 10 does not start, you need to determine after what actions the problem occurred: reinstalling programs or, removing system software or.
If before the problem the system worked stably and the black screen did not appear, then you may need to check the hardware of the device for a breakdown.
Computer won't turn on after update
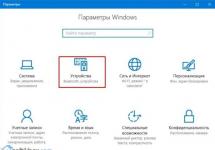
In the window that opens, select the tile called “Diagnostics” and then the “Recovery” option. The system will do everything for you.
Wait a little and all the missing components will be installed and the computer will restart.
If Windows does not start after diagnostics and the black screen is still present, you should roll back the updates and return to the old version of the operating system.
Microsoft may not have fixed the installation issue for your device yet.
To roll back the OS to a previous version, use the above-mentioned diagnostic window. Click the diagnostics tile, then the advanced options tab.

Start System Restore:

In the window that opens, you will see all existing restore points and the date they were created. Select a point with the current date and click “Continue”.

In a few minutes, the newly installed system will be completely removed from the computer and, by restarting the computer, you will return to using the previous version of the OS.

Black screen when booting the system
If the system takes a long time to boot and you only see a black screen, you should try restoring the settings using the diagnostic window, as described in the previous paragraph of the article.
In most cases, the system restarts and starts working successfully again. Perhaps the black screen appeared due to incorrect installation of drivers.

A black screen at startup may be a result of your computer being infected with virus or spyware.
In this case, you should completely reinstall the operating system without saving any user files and programs, because they can transfer the virus to the new OS.
Windows 10 takes a long time to load
If your device's RAM is less than 2 GB, Windows 10 running slowly is quite normal.
Your computer's hardware cannot handle the updated OS version.
For more comfortable work, install one of the previous versions of Windows on your computer; it will not start for a long time.
Optimizing the operation of the OS includes the following steps:
- Removing all unnecessary programs from the startup menu. You can view the list of software that loads when you turn on the computer in Explorer; to do this, open the “Startup” tab;
Press the Ctrl+Shift+Esc and next buttons simultaneously to see all applications, just open the “Startup” section.
Then right-click on the unnecessary program and click disable.

- Scan your computer for malware using powerful antivirus software;
- Update the store and remove unnecessary applications from it, they can run in the background and load the system;
Creating a disk with a restored version of the OS
You can only create a recovery disk using a working OS on another computer. Go to the control panel and enter the following text in the search field: “recovery disk”.
After which you will see the following results. Click on the first one.

It sometimes happens that users' computers experience problems after the latest Windows 10 update. The operating system has performed a so-called “major” update to Windows 10. After loading the system, the user discovers that as a result of installing the update, some functionality of the system has changed, some components do not function correctly, as usual.
I encountered some problems on my computer after updating the operating system to Windows 10 1803 (Windows 10 April 2018 Update). So I decided to write this article to tell you how you can fix some of the problems. These situations may not occur on all computers, and you may not have to do anything.
Immediately after the official release of the big Windows 10 update, I updated my computers. Read more about different ways to install an update to a new version of Windows 10. The installation of the system update went without any problems.
As a result of applying updates, Microsoft adds or removes some functionality in the OS and changes settings. In this article we will look at some situations that I encountered on my computer.
We will touch on ways to solve problems that arose after the last system update:
- The hidden recovery partition gets a drive letter in File Explorer.
- The microphone does not work in applications.
- The camera does not work in applications.
A recovery section has appeared in Explorer
Immediately after updating the computer, I opened Explorer and saw that a new disk with a size of 450 MB appeared there. The disk properties indicate that it is an "Original Equipment Manufacturer (OEM) Partition".
It is strange that this partition appeared on the desktop PC, but on my two laptops the additional partition did not appear. In principle, there should not be such a section on a desktop computer, unlike a laptop (which would be logical), since the system unit was assembled from individual parts, and was not purchased assembled from the PC manufacturer.
After opening Disk Management, I realized that this is a recovery partition that is created on the hard drive with a partition table during the installation of the operating system. After updating Windows 10, the system for some reason assigned a letter to this partition, made the disk open, and named it “Original Equipment Manufacturer (OEM) Partition.”
This is a service hidden partition, so it would be correct to hide the disk partition in Explorer, because it is completely unnecessary there. In the article, I have already described in detail how you can hide a disk partition in different ways. Please note that you cannot remove the letter of the problematic drive from the Disk Management snap-in.
I’ll duplicate the working method here:
- Run Command Prompt as Administrator. Read how to start Command Prompt on Windows
- Enter the commands sequentially (after entering each command, press the “Enter” key):
- The command line interpreter window will display all drives connected to this computer. To select the right drive, refer to the drive letter and drive size that are displayed in Explorer.
- Enter the command (volume number is the disk number displayed in the command line, opposite the drive letter):
- Select the drive letter assigned to the recovery partition on your computer. In this case, the letter “D” is selected, you may have another letter. Run the command:
Close the command prompt. Open File Explorer and make sure that the recovery partition has disappeared from the Devices and Drives section.
The microphone does not work in installed programs on the computer
The next problem was the microphone not working. This problem was discovered by accident. I installed Skype on my wife's smartphone. Then I decided to demonstrate how the application works: I called from another room from Skype on my computer to Skype on my mobile phone.
It turned out that they couldn’t hear me, but I could hear everything. Before the Windows 10 update, the microphone in Skype worked normally.
During the conversation, a message in Skype indicated that the program could not detect the sound card. I checked the sound settings in the system and in the program: everything is configured as expected. The microphone indicator works, I can hear myself through the speakers, but nothing in the program works.
First I ran the system one, but the tool did not identify any problems with the sound. Then I reinstalled the audio driver, but that didn't help. An Internet search turned up nothing. I once again made sure that the settings on the computer and in the program are correct. In Windows Settings, in the “Sound” section, the microphone works normally, but for some reason Skype cannot detect the sound card.
To test the microphone in another program, I launched Camtasia Studio and tried to record a short video. The program immediately warned that there were problems with sound on the computer. It turns out that third-party applications have nothing to do with it, the problem arose in the operating system. Meanwhile, the microphone in Windows works.
I started looking at all the settings in Windows 10 Settings. The key to solving the problem lay in the “Privacy” section.
Under Privacy, under Application Permissions, select Microphone, and then change some settings:
- Check the Allow microphone access on this device option to ensure microphone access is enabled.
- In the “Allow microphone access” setting, you need to move the switch to the “On” position.

- In the “Select apps that can access your microphone” section, find Skype (or another program) and slide the switch to the “On” position.

After this, the problem of the microphone not working in programs installed on the computer was solved. It turns out that the operating system, after updating to a new version, disabled access to the microphone for programs in order to protect privacy.
The camera does not work in programs on the computer
If a problem with the camera's operation arose after updating the system, you can solve it using the method described above.
Follow these steps:
- From the Start menu, enter the Settings app.
- Open the “Privacy” section, in the “Application Permissions” setting, open the “Camera” setting.
- Make sure camera access is enabled on this computer. In the Allow apps to access the camera option, slide the switch to the On position.
- In the “Select applications that can access the camera” setting, allow the necessary programs to access the camera.

Conclusions of the article
If problems occur after the latest Windows 10 update, the user can change some system settings. In particular, you can hide the recovery partition from Explorer and solve the problem of non-working devices: microphone and camera.
This article contains the most common errors when starting Windows 10, as well as how to fix them. We hope this information will make life a little easier for those who switched to a new version of the system and suddenly found themselves between a rock and a hard place.
1 Windows 10: “The computer is not starting correctly”
The first common problem when starting Windows 10 is that the system reports some critical error ( CRITICAL_PROCESS_DIED, INACCESSIBLE_BOOT_DEVICE), and then displays a blue "Automatic Repair" screen with the text .
Automatic recovery: the computer did not start correctly
The cause of this error, in most cases, is damage and deletion of system files or registry entries. This may be caused by installing and uninstalling programs, or by antivirus programs or Windows registry cleaning utilities.
The solution to the problem is to repair files and registry entries that are damaged:
- Click on the button Extra options on the blue screen, select Troubleshooting> Extra options > Boot Options.
- Click Reboot.
- In the window Boot Options Press the F6 key or number 6 on the numeric keypad to launch Safe Mode with command line support.
- The computer will restart in Safe Mode and Command Prompt will automatically open. In it enter:
The computer will restart and after that Windows will start in normal mode.
2 Windows 10 does not load beyond the logo
Another known problem is that the system boots all the way to the Windows logo, after which the computer randomly shuts down. The reason for this error is also damage to system files, however, unlike the first case, the damage is so serious that the system cannot start the recovery itself.
In this case, you will have to create a Windows emergency recovery disk on another Windows 10 PC:
- In the Windows 10 Control Panel, find and select Recovery > Creating a recovery disc.
- In the window that appears, set the parameter Back up system files to a recovery drive and press Dalley.
- Connect an empty USB drive to your computer. Select it in the recovery disk creation window and click Next > Create.Wait until the files are copied and press Ready.
- Remove the USB drive from your computer, connect it to the one that won't run Windows 10, and enable booting from it in the BIOS.
- The Windows Recovery Environment will launch. You need to select Restoring a system image, or point Command line, and then enter the commands from the instructions for solving the first problem.
 Windows Recovery Environment
 You can also run the system recovery environment from the disk from which you installed Windows. To do this, you need to boot from the installation disk, in the bootloader instead Install press System Restore. In the menu that appears, select Troubleshooting> Extra options. The same options window above will open.
After recovery, the computer will restart. Reset the BIOS to boot from the hard drive and the system should start correctly.
3 Errors “Boot Failure” and “An operating system wasn’t found”
In some cases, when starting Windows 10, instead of loading the operating system, a black screen appears with one of two errors:
- Boot failure. Reboot and Select Proper Boot device or insert boot media in selected boot device.
- An operating system wasn’t found. Try disconnecting any drives that don’t contain an operating system. Press Ctrl+Alt+Del to restart.
There can also be two reasons for this error:
- Incorrect boot device order in BIOS or UEFI. Make sure you are booting from the exact drive where Windows 10 is installed.
- Damage to the system bootloader. In this case, you will also need an installation disk or a Windows 10 emergency recovery disk. After booting from it, in the recovery environment you need to select Startup Recovery and let the bootloader files be overwritten.
The problem may also be hardware damage to the hard drive from which the boot is made.
 Boot Failure Error
 4 Windows 10 won't start: black screen
A common error when starting Windows 10 is a black screen with no signs of loading the desktop, with or without the cursor frozen on the screen. This often happens as a result of incorrect installation of any drivers: after rebooting, the computer works, but the OS does not load.

In most cases, the solution to the problem lies in a system rollback. To do this, you will also need an installation disk or a Windows 10 emergency recovery disk. After booting from it, in the recovery environment you can try selecting System Restore.
This will roll back the system to the state before the problem occurred. The system will prompt you to select a restore point to which to rollback, and after confirmation it will perform it. As a rule, after a reboot the black screen disappears.

5 Windows 10 takes a long time to load when turned on
There is a situation when Windows 10 does not load, the waiting icon is spinning, and that’s it. In fact, most likely, nothing bad is happening - the system is simply installing the updates that it downloaded the last time you used the computer.
In this situation, the best thing to do is just wait. This condition may last for several hours depending on the number and volume of downloaded updates. It is recommended not to turn off the computer, but to leave it in the boot state for 1-2 hours.
To prevent this error from happening again when starting Windows 10, you can set your computer to update on a schedule, and the system will not download updates without your knowledge. Read about how to edit update policies in our.
After the next update, the Windows 10 system began to reboot cyclically. Namely, after welcoming Windows 10, the following messages appear: trying to restore a previous version of Windows... Restoring a previous version of Windows... Loads, loads, then shuts down, reboots and again the same picture.
Attempts to eliminate
There is no way to enter safe mode using F8.
Booting from the Windows 10 installation disc and running System Restore

I tried using the "Restore Windows using a restore point" and "Troubleshoot problems that prevent Windows from starting" tools.

But I received a message that the system was not selected.
I decided to activate launch in safe mode via the command line.

bcdedit /set (default) safeboot minimal- for the next boot in safe mode.
Team bcdedit /deletevalue (default) safeboot - to cancel booting into safe mode.
But the system issued a message "Unable to open boot configuration data. The requested system device could not be found"
Cause
Most likely, the BCD bootloader configuration was damaged during the update.
Solution
So, to restore the boot loader (BCD) configuration, you need to boot from the original installation disk with Windows 10 (or a recovery disk or a specially prepared bootable USB flash drive) and open a command line window: by selecting System Restore -> Diagnostics -> Command Line. Above are screenshots.
Let's launch diskpart:
Let's display a list of disks in the system:
Let's select the disk on which Windows 10 is installed (if there is only one hard disk in the system, its index will be zero):
Let's display a list of partitions in the system:
Let's define an EFI partition, this can be done by the size of 100-450 MB and has a FAT32 file system. Let's remember the letter and index assigned to the EFI partition and the partition with Windows 10 installed. If the EFI partition does not have a letter, then assign an arbitrary drive letter to the hidden EFI partition:
assign letter=V:
Finishing work with diskpart:
Let's go to the directory with the bootloader ( boot) on a hidden section. Depending on the situation, the directory may be located in different folders. Need to find the folder boot. As a rule, you can go to it using this command:
cd /d v:\efi\microsoft\boot\
Using the utility bcdboot.exe Let's recreate the BCD storage by copying the boot environment files from the system directory:
bcdboot C:\Windows /L ru-ru /S V: /F ALL
Please note that the Windows partition may have a different letter; this can be seen in diskpart.
Let's restart the computer.
Microsoft has been celebrating the presence of Windows 10 in the operating system market in the world for more than a year now.
The premiere was quite successful, although it cannot be said that it is what Microsoft wanted, so it constantly releases updates, and after that it happens that the computer or laptop does not work - it does not start.
It happens that a black screen appears, the sound disappears, the computer slows down, games (for example, tanks) do not start, the keyboard does not work, does not turn on, freezes, errors appear, startup does not work, the computer or laptop constantly reboots, the mouse does not work, it becomes quiet sound, a blue screen appears, the Internet does not work and other problems.
Owners of the Pro or Enterprise version at least have the ability to control updates (whether to defer or disable them), while on the Home versions, users cannot take advantage of these tools.
On the one hand, Microsoft wants every Windows 10 user to always have the current software, and this is important from a security point of view, only today is the era of hardware configurations, and some updates in combination with certain hardware can ruin a lot.
Last week, one update simply broke many systems, sending them into an endless sequence of reboots.
Microsoft is already working on this issue and is going to improve the update in the near future.
Fortunately, this problem does not affect too many computers/laptops, and it is still unknown what circumstances cause computers to go into endless reboots. (though this is probably an effect of introducing a Win32 app into the store).
As you probably know, every Windows 10 update is first tested by Insiders, so such tests only give an idea of the "general" operation of the system.
The software should function well on every possible configuration (and on about half a billion computers), it would be nice to test a larger group to have an idea of what an update might break, but that's not realistic.
So this in itself is a dead end for Microsoft, but it must maintain the current update policy.
However, this does cause some problems for some computers with "exotic" hardware.
There are a surprising number of controllers for Windows 10 compatible devices, and the system must be compatible with each of them during its development to maintain compatibility for the life of the computer or laptop.
Therefore, forced installation of subsequent updates is extremely problematic, since the consumer will never be sure that the next update package will not ruin the system.
What to do if errors have already appeared? I won’t say that it is very easy to restore its former performance, but with patience it is possible. How? More on this below.
What to do if after updating Windows 10 the system does not start - a black screen appears

There are different types of Windows 10 updates - cumulative security updates and system updates where a new version is installed.
The latter take a very long time to install, even when you have high-speed Internet, and after that a black screen appears.
But don't panic. So for many, this does not last long - this happens in the background setting up a computer or laptop.
Just wait (no more than 5 minutes) and the screen will light up. It's another matter when the black screen continues to hang.
This can happen and after the update, you will be greeted with a black screen when logging in. What to do then?
This means that Windows 10 has not loaded the system shell and there is no desktop personalization.
This error appears when installing some versions of Windows 10. Fortunately, this is not a fatal error and can be fixed without losing data.
If the mouse cursor works and the system responds to keys, you can run some functions to diagnose the error and make the necessary corrections.
Press CTRL + Shift + Delete (Del) to launch Task Manager. Then at the top click “File -> “Run new task” - a window will appear.
In it, enter the command “cmd” and then select the option “Create this task with administrator rights” and click “OK”. This will bring up a command prompt in administrator mode.
Enter the command “sfc /scannow” (without quotes) into it and confirm your entry with the Enter key.
Now the disk will be checked for errors - if something is found, the system will automatically fix the problems. If this solution does not help, the black screen continues to remain, proceed to the next step.
Restart Task Manager and select File > Run New Task. This time type "regedit" (without the quotes) and click OK.
In the Registry Editor window, expanding each branch in the sidebar on the left, navigate to the following path:
HKEY_LOCAL_MACHINE\SOFTWARE\Microsoft\ActiveSetup\Installed Components

After expanding the “Installed Components” key, you need to find the key, which has the default value “Windows Desktop Update”. Now we check each key in turn until we find the one that has the specified value.
When we find it, we must remove it. Click on the found key on the left and right-click and select "Delete". After removal, you can close the Registry Editor.
To do this, in the task manager window, select the menu “File” -> “Run new task”, and then enter the command “msconfig (without quotes). Confirm with "OK".
In the new window, go to the “Boot” tab and check the “Safe startup” checkbox at the bottom. Leave the rest of the settings as default and restart your computer.

To do this, press the keyboard shortcut CTRL + ALE + Delete, and then in the lower right corner, select the restart option.
The computer or laptop will start in safe mode, and after logging in you will see a desktop with a taskbar and a Start menu.
Windows 10 doesn't work after updating - no sound
If you have Realtek, VIA or Conexant sound cards, then after updating Windows 10, some problems may arise due to which the sound does not work.
Fortunately, the first solutions have already appeared that can correct the problems or minimize them.
You can try switching the options in the sound card settings. To do this, right-click on the speaker icon (in the tray) and select “Playback devices”.
Find in the list the device to which sound should be output and set it as default. For example, I use a Philips TV - like in the picture below.

Next, select "Properties". In the new window, go to the "Enhancements" tab and then select the "Disable all updates" option. Confirm the changes with the OK button - problems with distorted or missing sound should disappear.
On Conexant sound cards, it may happen that there is no sound at all - no matter what program you are running. Microsoft offered a solution to start the system.
Press the Windows + R key combination in Windows 10 and then enter the command “msconfig” (without quotes) and confirm it with OK.
In the system configuration window, go to the "Boot" tab, then click "Advanced options...". In the new window, select the "Maximum Memory" option and enter 3072 in the field below.

Limiting boot RAM usage to 3GB solves the problem with these music cards. However, Microsoft is working on a patch that will remove the need for this setting.
Start doesn't work after Windows 10 update
Start menu not working most of the time after Fall Creators Update? Start won't open or display all applications? Let's see what you can do to fix this error on Windows 10.
If you are also having problems with the Start menu after the update, then the first step is to use the Start button troubleshooter.
Launch the downloaded tool and then allow scanning. The program will look for possible errors related to the Start menu and then attempt to perform automatic repairs.
If the tool found a solution but it still didn't do anything, try running it again - sometimes you need to scan 3 or 4 times in a row to clear all the errors.
Games won't launch after Windows 10 update
Microsoft has officially admitted that games won't launch after updating Windows 10. This happens in games like Overwatch, Rocket League and Battlefield 1, tanks and so on.
This can happen even on high-end computers that can easily handle them at the highest graphics settings.
The company is already working on the corresponding changes, but now it is difficult to say when exactly they will be officially available.
Unfortunately, it is possible that this will only happen with the release of the Fall Creators Update, but you have another option on how to fix it.
Just visit the forum for the corresponding game and there are detailed descriptions of what to do.
Keyboard or mouse not working after Windows 10 update
Some users have reported that their keyboard or mouse does not work after updating Windows 10 if Logitech Set Point software is installed.
Microsoft Office or others do not allow you to write text on the keyboard. Built-in or USB keyboards may work in certain applications, such as Notepad, but not others, such as Microsoft Office or Microsoft Edge windows.
What to do? Update your Logitech Setpoint software. As with other driver errors, the solution is to update to the latest version.
Therefore, if you did not find a solution to your problem above, then simply describe the problem in the comments, and my friends and I will try to solve it. Good luck.
Developer:
https://support.microsoft.com
OS:
windows 10
Interface:
Russian