Modern smartphones are equipped with a GPS chip, which greatly simplifies our travels or searches for a specific address. However, there are often cases when GPS does not work well. And this is not always the fault of an insufficiently well-built smartphone. You can often improve the functioning of the navigation module by tinkering with the settings.
Many motorists have a full-fledged GPS navigator. Some of these devices have an antenna connector on the back wall or side. This allows you to enhance signal reception several times - you just need to get the appropriate antenna.
As for modern smartphones, we hasten to disappoint you. You will never find a special antenna connector in their composition. You can improve GPS reception on Android only using software methods. If they don't work, then you will have to come to terms with the current state of affairs. As you might guess, budget devices work worst with GPS satellites. This is explained by the fact that they are equipped with the cheapest and oldest navigation chips, which have a low operating speed and a weak signal receiver.
Visiting the settings section
In many smartphones and tablets, the GPS chip is completely disabled by default. In this case, the device determines its location using cell towers and Wi-Fi networks. To enable the navigation chip, you need to configure the device. To do this, do the following:
Step 1. Go to the section " Settings».
Step 2. Here you should be interested in the item “ Location».

Step 3. This item may have a different name on different devices. For example, on Samsung tablets you need to select the “ Connections" and click on the item " Geodata", at the same time activating the corresponding switch.
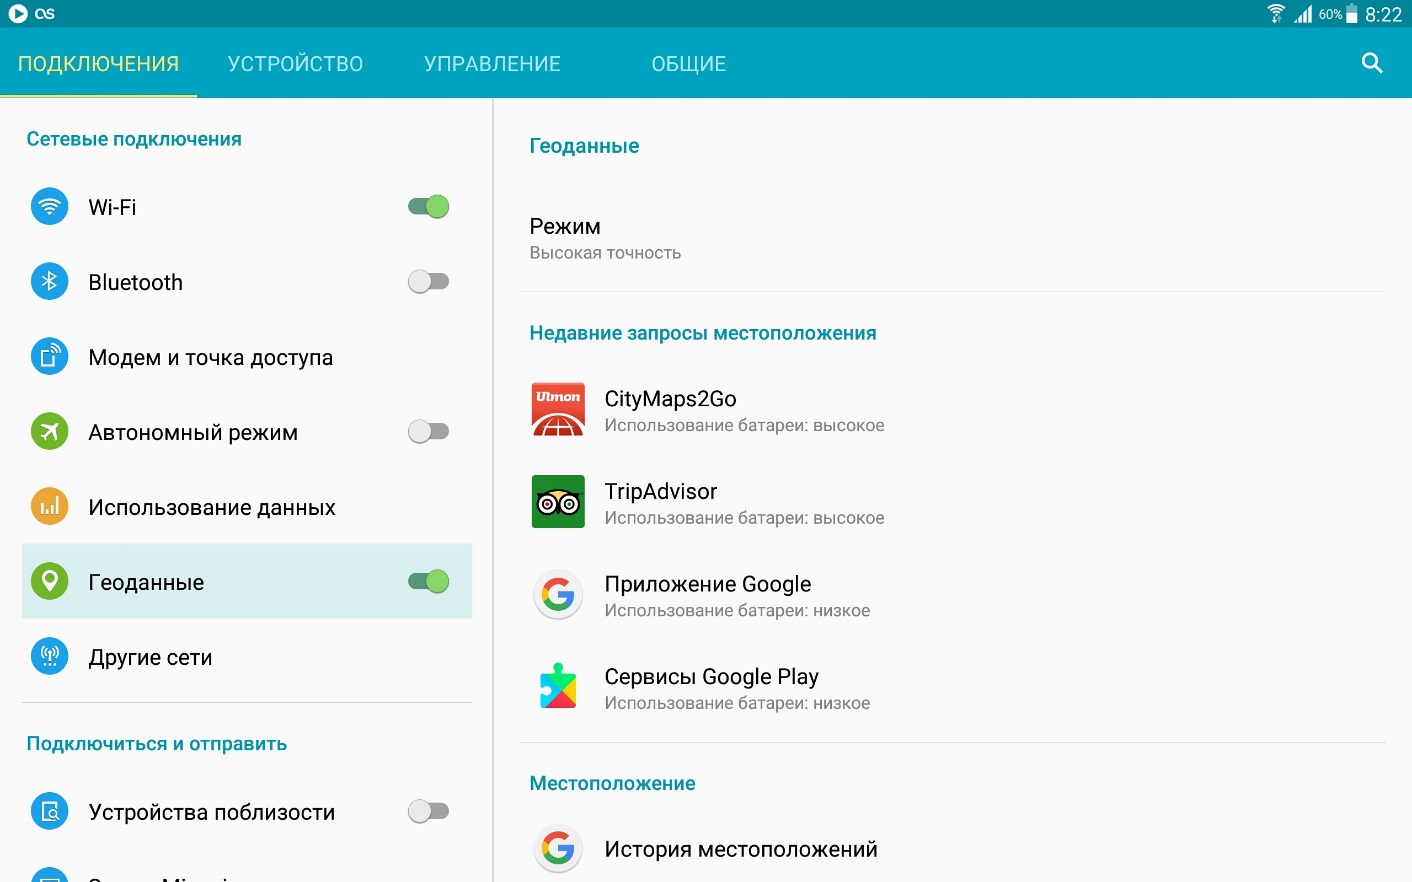
Step 4. In this section, you need to enable high location accuracy. The device must use all sources for this - GPS satellites, Wi-Fi networks and data from cell towers.

It should be noted that in this operating mode, energy consumption increases. And if this is practically not noticeable on new smartphones, then owners of budget and older devices will definitely feel the reduced battery life.
Compass calibration
If it is impossible to enhance the signal reception on smartphones, then no one can stop you from improving the performance of the digital compass. The fact is that on some devices it is not calibrated, as a result of which the navigation program cannot understand in time which direction of the world your smartphone is facing. At this moment it seems to you that the device does not pick up GPS.
To calibrate the compass you will need an app GPS Essentials. Download and install it, then do the following:
Step 1. Launch the program.

Step 2. Enter the mode Compass.

Step 3. If the compass works stably, then the problem is not with it. If the compass refuses to show the cardinal directions correctly, then calibrate it.
Step 4. First, rotate the smartphone around its axis with the screen facing up. Next, turn it over from bottom to top. Well, then turn it over from left to right. This should help. In some versions of the application, you must first select Calibrate in the section settings.
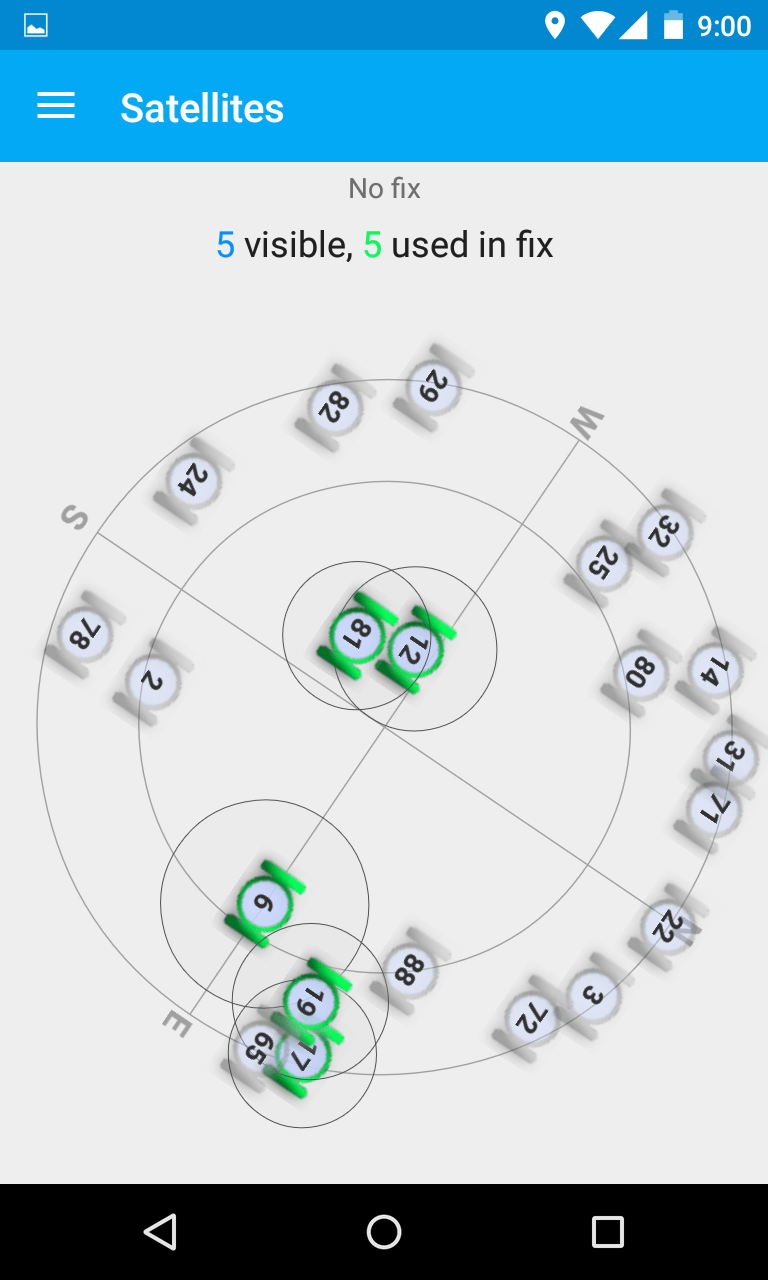
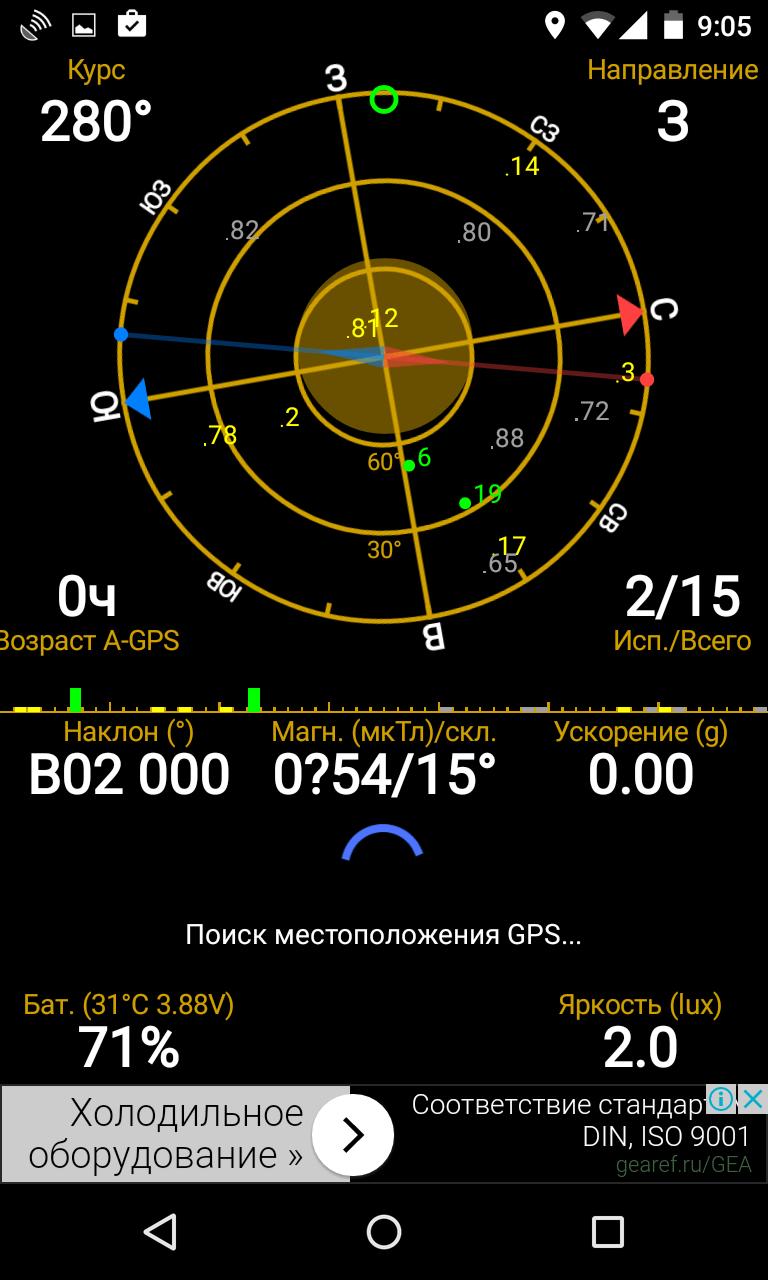
Viewing the number of visible GPS satellites
In the same GPS Essentials you can look at how many satellites your smartphone connects to. If it is large enough, then the navigation chip should not be blamed - the problem is in one of the programs. To view satellites, you need to select the item in the application menu Satellites.
Resetting GPS data
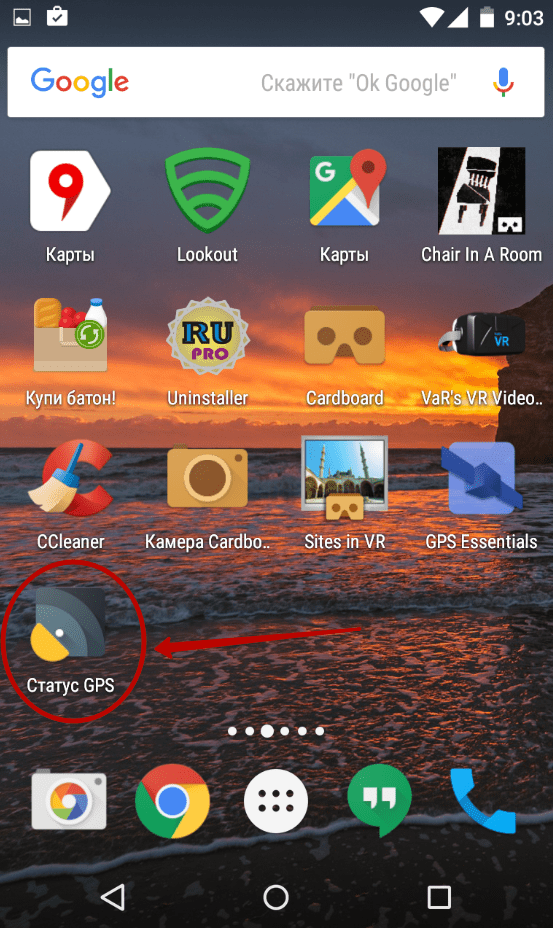
A common problem with some devices is that they take a long time to lock onto specific GPS satellites, even when they have managed to move out of sight. The application can help in this case GPS Status & Toolbox. It will reset the GPS data, after which the connection to satellites will be made from scratch.
Step 1. Download and install the utility.
Step 2. Launch the installed application, agreeing to the terms of the license agreement.

Step 3. On the main screen of the program you will see readings from various sensors, as well as information about the number of GPS satellites overhead.
Step 4. Click anywhere on the display, after which you can pull out the curtain with the main menu on the left. Here you can calibrate the compass if this was not possible using the application discussed earlier. But now you need to click on the item “ A-GPS state management».

Step 5. In the pop-up menu, click the button " Reset».

Step 6. After the reset is complete, return to this pop-up menu by clicking the " Download».
What to look for when buying a new smartphone?
Now you know the answer to the question “How to set up GPS on Android?” But all this will not help you very much if you want to use your smartphone as a GPS navigator on a regular basis. It is better to get a good modern smartphone for these purposes. When choosing it, be sure to read the full technical specifications. In them you need to find a mention of support for A-GPS technology - it greatly reduces energy consumption. The ideal smartphone for you will be one that also works with GLONASS satellites. Fortunately, almost all devices that have been imported into our country over the past year have support for the Russian navigation system. But, again, you still need to look at the specifications of the device before purchasing it.
All modern Android smartphones and tablets are equipped with a GPS module. This allows these devices to be used as GPS navigators. In addition, the presence of a GPS module allows you to leave GPS tags on photos and use many other useful functions. In this regard, many novice users are interested in how to enable GPS on Android. In this article we will briefly consider this issue.
As a rule, Android devices have a GPS module enabled. But, if you previously disabled this function, and now want to turn it back on, then you need to open Settings and go to the “Location” section.
At the top of the “Location” section there is a switch that is responsible for disabling and enabling GPS on Android.

If this switch glows blue, it means GPS is turned on. In addition to simply turning on GPS, you can change the navigation mode. To do this, go to the “Mode” section. Based on device sensors."

In the “Mode” section, you can choose one of three modes for determining your location.

Consider these modes:
- High accuracy. In this mode, all available information is used to determine location: data from a GPS sensor, data received using a Wi-Fi wireless network, as well as data received using a mobile network. If you turn on GPS in this mode, you will be able to determine your location with maximum accuracy.
- Save battery power. The operating mode intended for the device. In this mode, the GPS module. Instead, data obtained via Wi-Fi and mobile networks is used to determine location.
- Based on device sensors. In this mode, only information from the GPS module is used.
Also in the "Location" window, you can enable or disable the use of data about your location by Google services. To do this, go to the “Sending geodata” section.

In the “Sending Data” section there are two additional sections: “Sending Geodata” and “Location History”. Open each of these sections and turn off (or turn on) the use of your location data.

09.02.2017 14:36:00
In one of the articles we looked at the question of how to make a TV remote control out of a smartphone.
It is difficult to find a smartphone that is not equipped with a GPS module. Even the most budget gadgets have this useful navigation tool installed. It doesn’t matter what model your smartphone is if you need to get directions or find out the location in an unfamiliar place. To turn on GPS on your smartphone, you don’t need any special knowledge - you press the right button and everything works. But not everyone knows how to configure GPS on Android so that the smartphone’s battery does not overload.
We will tell you about the main stages of setting up GPS, and also recommend several Android applications with which you can check the operation of the GPS module.

GPS does not start automatically on your smartphone. To enable and configure it, you need to dig a little into the settings. In each version of Android, the activation path looks a little different. We will look at the main steps to enable and configure GPS in a smartphone running Android 6.0 Marshmallow.
Stage 1: Turning on
To turn on GPS, slide the notification shade down and click on the bar that displays the time, date, and battery charge. You need to click on the gear icon, after which you will be taken to Settings. In addition, you can access the settings through the corresponding button in the general menu. Find the Personal Data section and click on the Location button. At the top of the screen there will be a switch that activates GPS.
Stage 2: Setup
By default, the location of the smartphone is determined from all sources. GPS, Wi-Fi, Bluetooth and mobile networks data are used to accurately determine the location with an accuracy of 10-15 meters. This function ensures high reliability of geolocation, however, please note that this mode puts a lot of strain on the smartphone’s battery. Therefore, in the settings you can choose one of two economical modes:
- By network coordinates
- By GPS satellites
The first mode uses only Wi-Fi, Bluetooth and mobile network data. It is necessary that the smartphone is connected to the Internet via Wi-Fi, or the user needs to start Bluetooth mode. Without a network connection, the location of the smartphone is determined by the base station signal.
If there is no access to the Internet, and the nearest radio tower is several tens of kilometers away, then you should enable geolocation using GPS satellites.
Once the GPS on your smartphone is turned on and configured, you can safely install the navigator application for Android. The most convenient and functional navigator you can choose is .
To check how GPS works on your smartphone, you can download a special application from the Google Play store. We'll look at three programs available for free download. For them to work properly, you need to go outside.
Other Fly smartphones
All Fly phone models can be found in our online store.
AndroidTS GPS Test Free
OS version: Android 3.0 or later
Download
The application works with the main Russian and foreign navigation systems: GPS, GLONASS, QZSS, BeiDou Satellite Compass, GoogleMaps, OSMDroid OpenStreetMap, BingMap, Yandex. Maps, Map Test, AGPS, MGRS Maidenhead WGS84 Xtra data Datum GPS/KM VMG. Without leaving your home, you can find out your exact coordinates. The main functionality of the application is concentrated in 6 menu items:
- Compass
- Map of satellites in orbit
- Satellite data
- Route data
- Detailed map navigator
- Waypoint table
GPS Test
OS version: Android 4.0 or later
Download
 |
 |
 |
The application allows you to check the quality of GPS signal reception, supporting GPS, GLONASS, GALILEO, SBAS, Beidou and QZSS satellites geolocation systems.
Complete GPS test information is displayed on six main screens:
- GPS signal (SNR). A chart that shows the signal strength for each satellite, as well as the accuracy and status of the GNSS network.
- Positions of satellites in the sky.
- User's current location. Displayed with coordinates on the world map. The position of the sun and the transition curve between day and night are noted. The screen can be used as a navigator.
- Screen compass
- Current speed, course and altitude
- Current GPS reading time and local time in the current time zone, as well as sunrise and sunset data for a given location.
The disadvantage is the lack of Russian language. On the other hand, the application interface is easy to learn.
Almost all modern smartphones are equipped with a GPS chip. The navigation module is also present in most tablet computers running the Android operating system. However, not all users know that the chip is often disabled by default. As a result, such people are surprised that there are no geotags on the photos, and the Google Now service does not show the route to their home. Fortunately, you can enable GPS on your tablet and smartphone without any effort.
Why do you need GPS?
Decades ago, GPS satellites were only available to the military. But the Americans quickly realized that big money could be made from navigation chips, applications and maps. As a result, ordinary people gained access to the technology - they just needed to acquire the appropriate device. Initially, these were specialized GPS navigators. And now the navigation module has seriously decreased in size, and therefore it can be built even into an ordinary smartphone.
A GPS signal helps you understand where in the world you are now. This is useful for several reasons:
- The navigation app will help you not get lost in the forest;
- With navigation you can navigate even in an unfamiliar city;
- You can easily find the address you need;
- You escape from traffic jams - the “Traffic” service helps you avoid them;
- Various apps show you nearby eateries and shopping centers;
- GPS helps determine your speed.
In short, a navigation chip can be very useful. But you will have to pay for using it. If you decide to turn on GPS on Android, then get ready for higher power consumption. This is most noticeable on older devices that do not support A-GPS technology. Also, inexpensive and older smartphones have problems with GPS signal reception. Ours will help you get closer to solving it.
GPS activation
But enough of the lyrics... Let's find out how to enable GPS on an Android phone. This is done very simply:
1. Go to the device menu and tap on the “ Settings».
2. Here select “ Location».

3. Click on the item " Mode».

4. Select location mode " According to all sources" or " By GPS satellites».

Note: On Samsung and some other smartphones, the item names may differ. For example, the section " Location" may have the name " Geodata».

Android is one of the two (the second IOS) most common operating systems for tablets and smartphones Samsung Galaxy, LG, Lenovo, etc.
Its advantage is a large number of free applications that support GPS navigation. Unfortunately, the quality of many of them leaves much to be desired.
Some of the most popular and free gps applications running on a phone running Android 6.0, 5.1, 4.4, 4.4 2 and so on are Google Maps, Yanosik, MapaMap, Navatar.
Your Android tablet or smartphone offers enormous possibilities and can serve as an ideal travel guide.
It can take you directly to your place of residence using various audio-visual aids.
To enable the GPS module on your Android, make sure that it is built into your phone.
This can be determined by the GPS Test application and then run the global positioning system on our device.
How to check that a tablet or smartphone has GPS and turn it on
The easiest way to find out if your phone has built-in GPS and turn it on is to use a special GPS Test application.
If you know that your device has it, then you can proceed directly to enable it.
If you are not sure, download the application from the play market, which automatically determines the signal level. Once installed, you should see a screen similar to the one below.

If there is a green icon in the status window in the upper left corner, this means that GPS is turned on. If the icon is red, then it is turned off - then you need to enable geodata.
The application will automatically take you to the geolocation options where you must enable GPS (geodata). Please note that the location of this menu may vary depending on the device and operating system version.
How to enable GPS on a smartphone with Android 6.0 and Android 5.1
If you have not installed the application, open “Settings” and go to the “Privacy and Security” section.

Then click on the “Geodata” item.

Now just move the slider to the right to enable the built-in GPS module in your Android phone.

NOTE: the above images are from a Samsung Galaxy A3 smartphone running Android 6.0.1.
How to enable GPS on a tablet with Android 4.4 and Android 4.4.2.
To enable navigation, open “Settings”, go to the “My location” section and check the appropriate boxes.

Then log into your desktop, go to “Menu” and click on the “Navigation” icon.

How to enable voice GPS on an Android phone
There are many GPS navigation programs on the Google Play Store. Unfortunately, most of them either have very limited functionality or require payment.
Open the application, read the terms of use and accept them. On the next green screen, click Next.
Then select a country from the list and click "Import" to download road maps. You can download more later.
Maps take up many megabytes and downloading them using mobile internet (eg 3G) can be quite expensive. Therefore it is better to use wifi.
Maps may take a few minutes to download, depending on the speed of your internet connection and the size of the map. Once loaded, you will see a green screen, slide it to the left and then click "Let's get started"
To make using the application easier, I recommend starting with your home address (or the one you will use most often).
To do this, go to the home screen in the top left corner and enter the address in the search field, then select an item from the list and press Enter.
The map will open. Click the gray block with the address. In the new window, click set as “Home” from the list below. In the new window, click set as “Home”.
The application will display a map. To return, click on the three lines icon in the lower right corner.
Over time, you will discover that Navfree has many additional options. For example, the route can be changed in many ways. You can add stops, select a tour and set a security mode.
If you are traveling internationally, I recommend downloading additional maps in the update.
Navfree settings also allow you to switch to pedestrian mode, which is useful when walking.
The night mode is also noteworthy. Thanks to it, your smartphone or tablet will not distract you with too high brightness.
How to turn on GPS without internet
When using GPS, it takes data from antennas. The accuracy and quality of such navigation is not ideal.
It is much better if the data comes directly from satellites. Then navigation occurs without the Internet.
For me, the best application for this is the “Navitel Navigator” application; it uses the locator built into the phone, but is paid.
Despite the growing infrastructure in our country, you can still find places where wireless Internet access is not possible, so GPS without a navigator will come in handy and not only in places without Internet coverage.
Today there are many applications that allow you to download previously selected maps to your smartphone or tablet for later use.
Programs for GPS navigation and their brief characteristics
- Google Maps is one of the most popular apps on your phone. Works quite well on line and has the ability to display Google orthomosaics.
- Yanosik - works on the Internet, the service is a little complicated, but the user has access to current information about traffic jams, accidents and radars.
- MapaMap - works offline (without the Internet), but the most useful feature is only available with a subscription.
- Navatar works online and has many useful features.
- OviMpas - work via the Internet. Available for Nokia phone users.
- Route 66 - works offline (without the Internet), and the online version is available after purchase.
- Vito Navigator - works offline (without the Internet), the basic version (free) is very modest.
- NaviExpert - works online, free trial version only.
- Skobbler - free version, offline only, limited selection of features.
That's all. Good luck.